
Download and sign up to Runner app
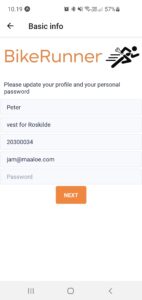 Once you have completed the courses you have been enrolled to on this site, you will be sent an email on how to download the app for Iphone or Android.
First time you log into the app you will need to fill out your basic profile info – such as name, phone number, address, email, if you prefer Danish or English etc.
Your zone
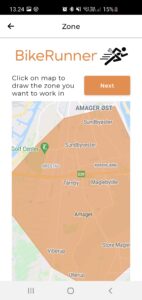 As part of the sign up process you also choose “your zone” – meaning the geographical area in which you want to receive orders from. As a rule thumb you are not allowed to charge for extra transport cost/time if you accept an order within your zone.
But if your zone is still the closest to the address, you might be sent the order anyways – and in that case you can ask for extra transport cost if you want. Send an sms to BikeRunner a la “I can do order X, for a transport cost of Y”, and we will check with the customer. You can also use the function “Make an offer” – where you can use the comments field to offer to come for a transport cost to the customer (more about this function later).
You can change your zone at any time, and please make sure it is always valid. It is shown publicly on the website for the customer, so do not draw a zone that you actually do not cover – especially if for some areas you are the only Runner.
Sign up to Stripe
Stripe is a third party payment platform (stripe.com) that is used both so that you are able to send invoices to the customer by email, but also to keep track of how much you owe us, or we owe you. If you do not sign up to Stripe, many functions will not work in the Runner app.
BikeRunner will NOT have access to the personal, bank- or ID-information that you are uploading when registering for a Stripe account, and you can close your account at any time. Before you start the sign-up flow to create a Stripe account you need to find, and have available:
- You International Bank Account Number (IBAN nr) – can usually be found at your digital log-in at your bank or contact your bank for guidance.
- An ID with a picture (ID-card, Passport, or driver’s license). It’s important that you create your Stripe account with the exact same name as it is written on your ID.
- Your Sundhedskort/your Danish yellow health card (to verify your address). Again, it’s important that you create your Stripe account with the exact same address as it is shown on this card. If you don’t have the Danish Yellow Health card, you can also use for example an electricity bill, appartement lease contract or a tax statement.
The process doesn’t require that you have a Danish Bank account, Danish ID or Danish address – but it does require you have a bank account, ID and proved address from somewhere in the world.
Active/Inactive
Please know that under your profile settings, you can at any time put yourself as either active (receives and accepts orders), or inactive. If you are in fact inactive for more than a couple of days, please remember to switch – since otherwise both us and the customers have a hard time knowing the capacity in certain areas.
Express orders
There is a setting for “Express orders” in the app right now – but it is not active yet (“doesn’t do anything”). When it does – we will let you know and explain it to you. It is about making more money on an order if you can do it within 2 hours.