
Patch 2 wheels tutorial
Patch a tube
List of tools
- Patch
- Glue
- Sandpaper
- Light coloured marker
- Bike pump
Preparation
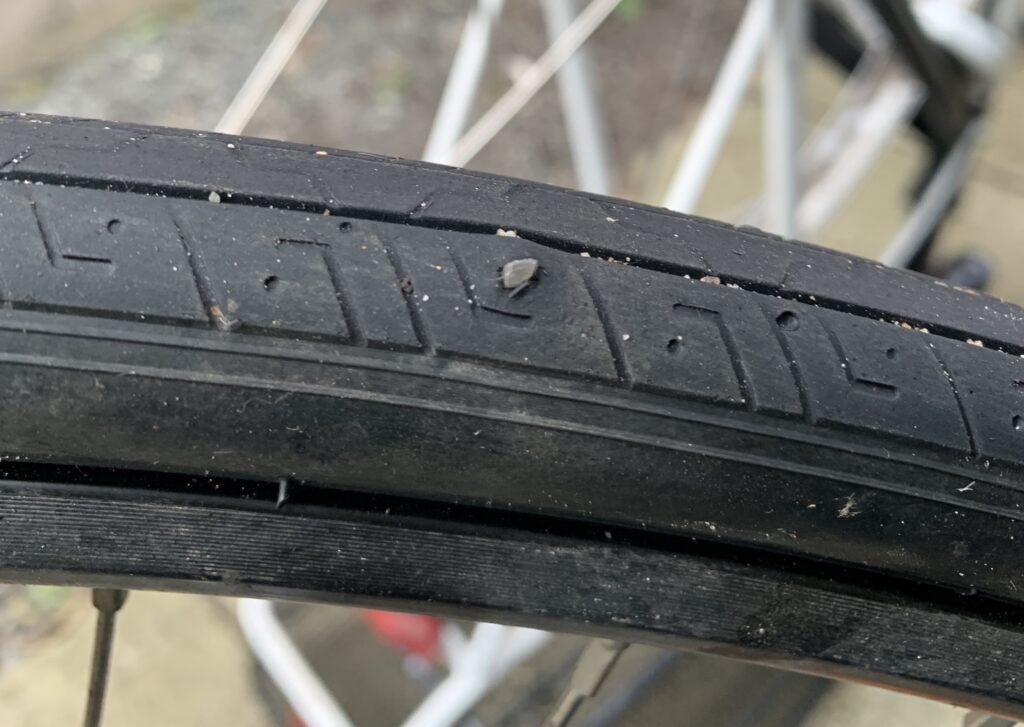
It is recommendable to have a clean surface to work on. In order avoid another puncture of the tube it is necessary to find the cause for the hole. Examine the tire carefully. On the inside slide your fingers along the surface of the tire. The tire has to be perfectly smooth. Is the tire already very worn on the inside it might not have been properly inflated for a long while causing the tire to deteriorate faster, notify the customer. On the outside examine the tire by squeezing it together. This will expose hidden holes in the tires. Make sure that no glass fragments, sharp chips of stone or other sharp objects remain in the tire. It can be helpful to remember the tubes position relative to the tire in order to locate the hole in the tube.
Method
The most difficult aspect of patching a hole in a tube is to locate the hole itself. There are multiple ways and tricks to help you with that. All of them require you to inflate the tube slightly.
- Find the hole’s location
- Most commonly you will be able to hear the hissing noise where air leaves the tube at the hole.
- Feeling the air leaving the tube with your hands or close lips can be another way of finding the hole.
- In case the hole is very small using a bath of water / soap water can be necessary.
- Immerse the tube in a container with water in sections. At the location of the hole you will be able to see air bubbles forming.
- Not at all customers you will be able to produce a container filled with water. Alternatively you can prepare a Spray bottle of soap water and store it together with your tools. Spray the soap water on the whole tube repeatedly until bubbles are forming around the hole.
- Don’t forget to check the valve for its function.
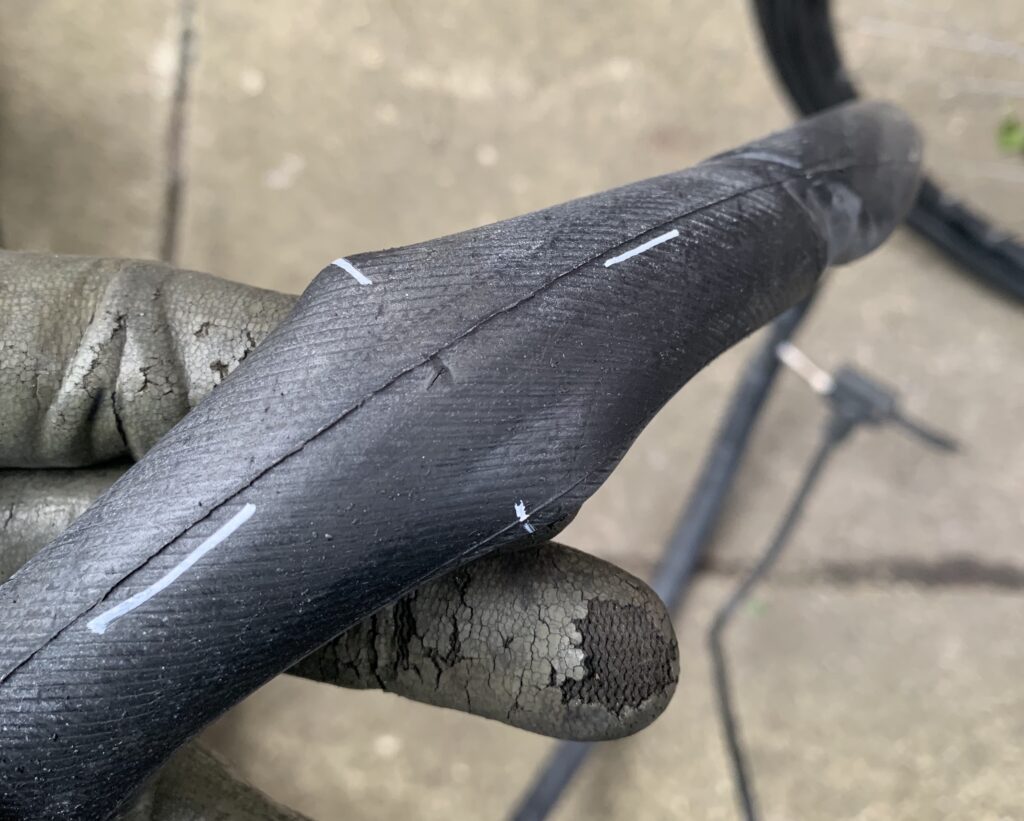
- Once you have located the hole, mark its position with a eg. white or yellow marker. I tend to mark the positions with crosslines, as the next steps might erase circular marks close to the hole.
- Deflate the tube completely.
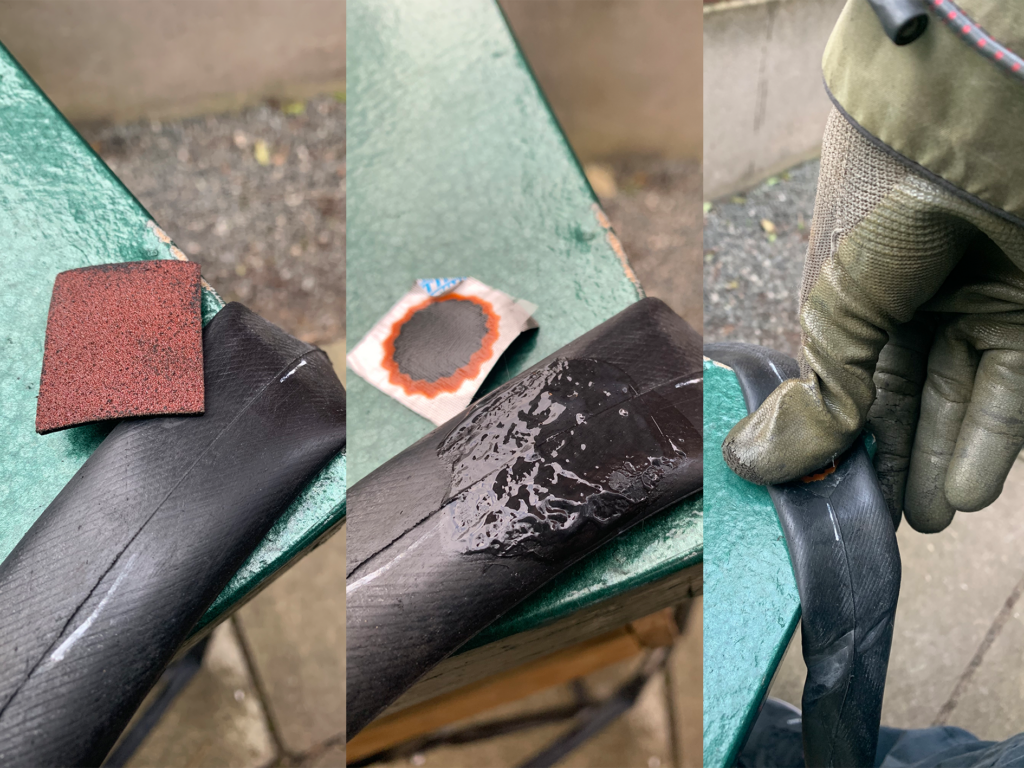
- Roughen the surface around the location of the hole generously with a piece of sandpaper. Most patch sets come with some sort of sand paper or similar.
- Clean the area from any rubber dust created in step 4.
- Apply an appropriate layer of glue (follow instructions of your glue brand). Most glues need to dry for 3-5 minutes before you can put on the patch.
- In very cold conditions it can be difficult for the glue to start reacting with the rubber. In that case I usually keep the portion of the tube in between my hands occasionally breathing on it to keep it somewhat warm.
- Prepare the patch.
- When the glue is almost dry to the touch press the patch on firmly. Keep the pressure for a few moments.
- Gently ply off the thin plastic foil covering the patch’s outside.
Notes
It can be that the tube is too old and the rubber in a very poor condition so that the glue doesn’t really bond. In that case notify the customer and replace the tube if permitted by the customer.
I personally had the biggest success with patches and glue from the brand TIP/TOP. The patches come in a variety of sizes and can bought separately in stead of buying a set every time.
Pro tip
To make sure that the patched tube sits well even in a worn out tire you can use a small amount of baby powder in the tire before inserting the tube. That reduces the friction inside the tube tremendously helping to squeeze a bit more mileage out of the tire for the customer.
Leave a Reply