
Assembly of new Mustang bike – COOP -tutorial
All Mustang bicycles are delivered between 85-95% assembled due to transport. Therefore, please complete the assembly of the bicycle. The assembly most often consists of: handlebars, saddle, pedals and possibly a basket. In addition, all screws, nuts and support legs must be retightened. For a full illustration also see the support videos provided by COOP.
- List of tools
- First assembly
- Tension in different parts
- Pedals
- Front wheel
- Basket
- Support wheels
- Saddle
- Steering
- Total steps of a COOP Mustang assembly:
- Check
List of tools
• Umbraco key 4, 5 and 6 mm
• Adjustable wrench + Bicycle pump
First assembly
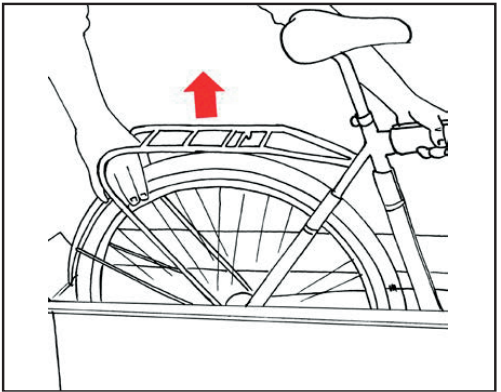
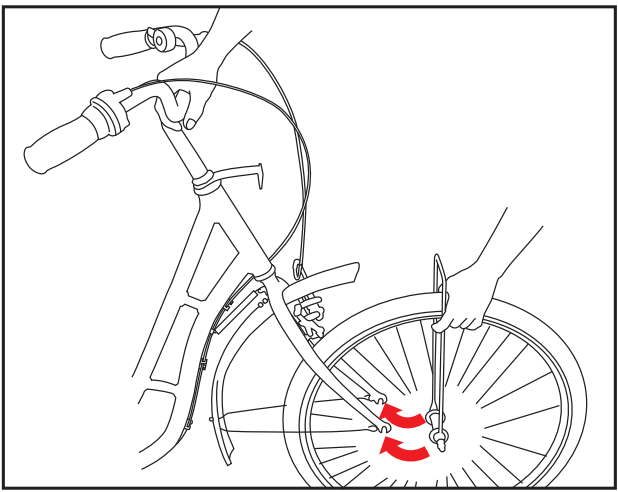
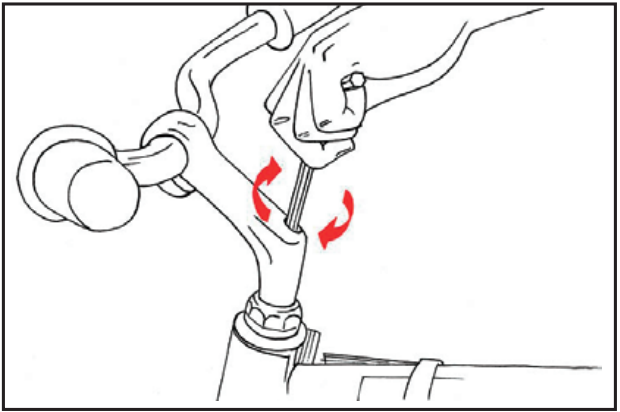
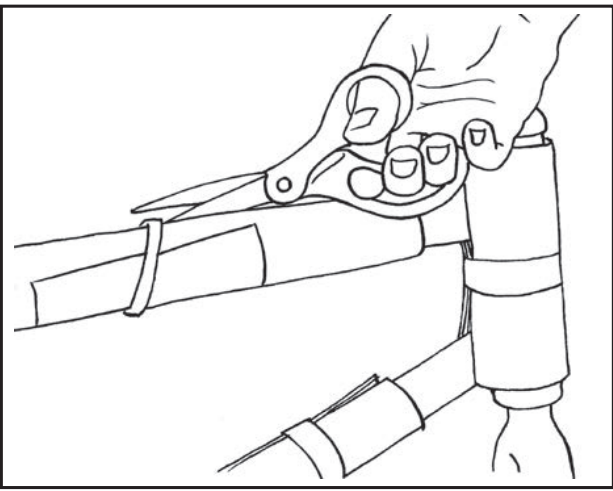
Tension in different parts
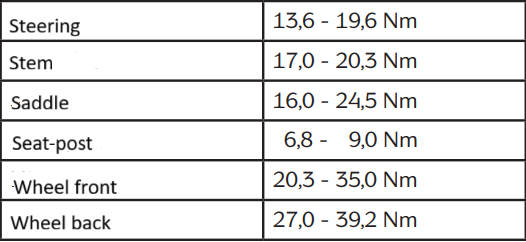
When you start assembling your new bike, we recommend that you use the tightening torques below.
However, it is important never to overtighten screws and bolts. If in doubt, you should contact your bicycle repair shop.
Pedals
Remove the cardboard protection on the pedal arms.
• Please note that there is a right pedal marked with an R (or WR) and a left pedal marked with an L (or WL).
Fitting the wrong pedal will damage the thread in the pedal arm and require an expensive repair.
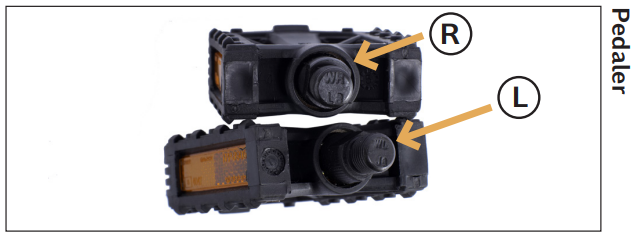
• The thread should be greased before assembly.
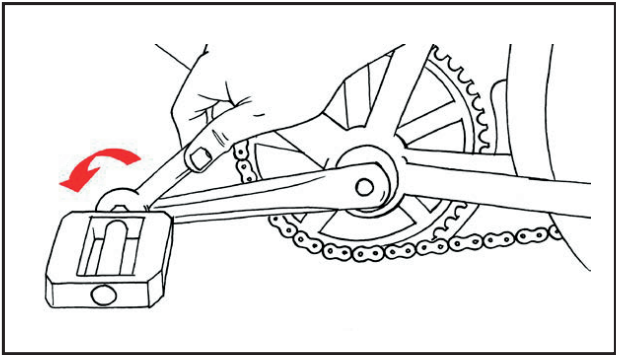
Screw the right pedal marked R into the right crank of the bicycle (the side where the sprocket is located). The pedal is screwed in clockwise. Use a 15 mm spanner to tighten the pedals.
Screw the left pedal marked L into the left crank (the side without the sprocket). The pedal is screwed in counterclockwise.
Front wheel
Install the front wheel.
If a front mundguard is installed from the start, remove it first.
If a fixed front basket is to be installed on the bike, attach the basket strut to the axle before installing the front wheel.
Finally, assemble and adjust the front brake.
Basket
There are several different baskets on Coop’s bicycles.
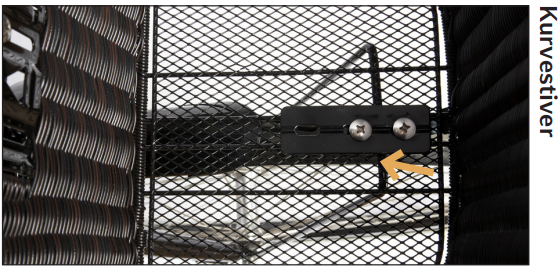
Some have brackets and others are simply mounted with screws and nuts. The basket is mounted on the pre-mounted basket holder on the head tube – possibly with the corresponding basket bracket, which is found in the bag with the manual, pedals and tools.
The oblong mounting plate bracket is placed on the inside of the basket and the screws are also inserted from the inside of the basket. Another washer and nut are attached and tightened on the back of the pre-mounted basket holder with a Phillips screwdriver/Allen key and an 8/10 mm open-end wrench.
The basket struts can now be mounted on the underside of the basket.
The bent bracket is placed over the basket strut on the underside of the basket, while the rounded flat washer bracket and the screws are inserted from the inside of the basket. Remember to use washers both from the inside and from the outside.
• Remember to insert the screws from the inside of the basket to avoid sharp edges.
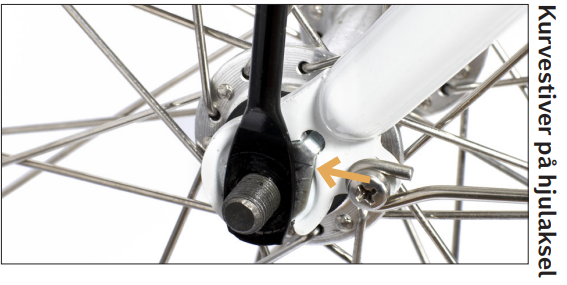
The basket struts are mounted in the thread on the wheel axle. The lock washer with the small split is placed closest
to the front fork, followed by the washer. The basket strut eye is placed and the nut is tightened. On some
models, an extra eye is cast on the front fork, where the basket struts are to be mounted.
Support wheels
If the children’s bike comes with training wheels, mount them on the rear wheel axle.
Start by mounting the training wheels on the training wheel arms.
Then remove the outer two axle nuts located on each side of the bike’s rear axle. The inner axle nut holds the rear wheel in place.
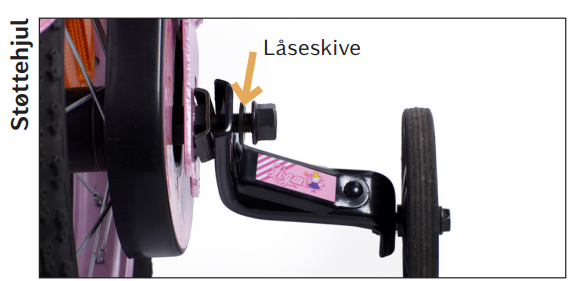
The locking disc is pushed vertically onto the axle. Make sure that the small split of the locking disc is in the groove, either on one or the other side of the axle. The support wheel arm is placed on the axle and the nut is tightened.
Setting/adjusting the support wheels: Hold the bike completely straight and set a distance of about
6 mm between the support wheels and the ground on both sides of the bike. Make sure the distance is the same on both sides.
Important! Training wheels prevent the normal tilt that a bicycle has when turning. If the bicycle is turned too quickly, the bicycle can tip over, resulting in an accident. Therefore, avoid riding fast or turning sharply with training wheels installed.
Saddle
Sit on the saddle and place one foot on the pedal. The pedal should be fully depressed and the crank arm should be in a vertical position (the pedal is closest to the ground). When you are sitting correctly on the saddle, there should be a slight bend in your knee. Also, make sure that you can reach the ground with the toe of your shoe. This applies to all regular everyday bicycles.
The following rules of thumb apply to children’s bicycles:
Children under 10 years of age should be able to reach the ground with a flat foot on both legs at the same time.
Children over 10 years of age should be able to reach the ground with a flat foot on one leg. The saddle height is adjusted by loosening the bolt on the side of the seat tube and then raising/lowering the saddle to the desired height.
Vigtigt! Sadlen må ikke hæves højere end til minimumsmarkeringen på sadelpinden. Monteres sadlen med en synlig miniumsmarkering, er der risiko for, at sadelpinden knækker. Se foto.
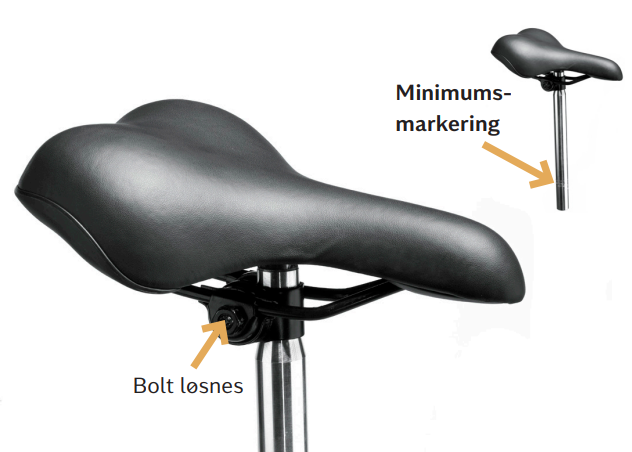
The saddle should sit horizontally and be adjusted differently depending on the type of saddle. For saddles with a seatpost on a sled, the bolt in the middle of the sled must be loosened and the saddle can be tilted. The saddle can also be pushed back and forth as needed, but it is recommended that the saddle be clamped in the middle of the saddle frame. Saddles with saddle brackets can be tilted by loosening the nuts on the side of the saddle bracket under the saddle. Remember to tighten them.
Steering
Handlebars with regular stem and adjustable stem:
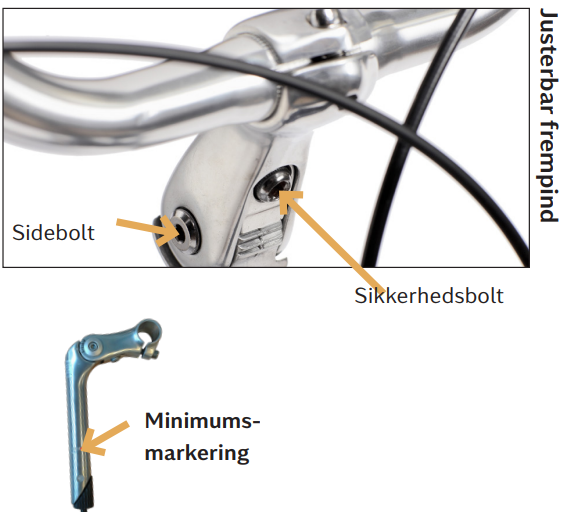
The handlebars are raised/lowered to the desired position by loosening the center expander bolt. When the handlebars are set to the desired position, tighten the center expander bolt again. Some bicycles have adjustable stem and the angle of the handlebars is adjusted by loosening the side bolts and the safety bolt with plate, which is located on the underside of the angle stem. The handlebars are set to the desired angle and the safety bolt with plate is positioned correctly and tightened. Also remember to retighten the side bolts.
Total steps of a COOP Mustang assembly:
- Lubrication and assembly of pedals
- Lubrication and assembly of handlebars and stem
- Adjustment of gears and brakes
- Lubrication and adjustment of chain
- Inflate tires to correct tire pressure
- Check spoke tension
- Install any additional equipment purchased
- Tighten all bolts and screws
- On electric bikes, check display, motor, battery and plug connections
Check
Give the bike a full check. Take it for a short ride, shifting through all gears, testing the brakes and making sure that the tire pressure is perfect. For some extra service lubricate the chain if you think it could be needed for some extra lifespan.
Leave a Reply